Ba Pao dough with yeast and baking powder

I like bapao, bakpao, ba pao or boazi. I always try to have a dozen or so in the freezer for hungry children just back from a busy school day. 😉
You can leave them empty and use them as white buns. Cut them open and add duck breast, lettuce and hoisin sauce for example. 😉

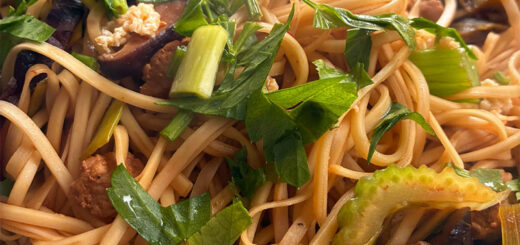
Ba pao filling
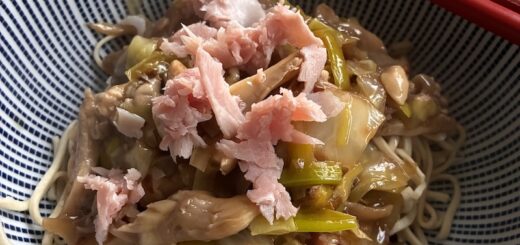
I usually fill my ba pao before steaming. I make a filling with minced meat, garlic, onions, pepper, salt, sweet soy sauce, and celery. But you can also choose fish such as tuna or shrimp. I also like ba pao vegetarian with tempeh or mushrooms.
A classic recipe for ba pao filling by Beb Vuyk can be found here.
Different flour
Today I try a new recipe for the dough. This recipe makes the dough a lot smoother and fluffier than my original Beb Vuyk recipe with plain flour. This new recipe is also a lot faster than Beb’s.
The flour I use I buy at my Chinese food shop (ask for ba pao flour). It is whiter than regular flour and it is super fine in texture.
I also tried this new recipe with regular flower but with a super fine grind. That works fine too!
This ba pao recipe is enough for about 23 ba pao and ready in 1 hour and 45 minutes (proofing time included).
Ingredients
400 grams Ba Pao flour (Red Lotus Special Flour) or regular flour with a super fine grind
210 ml of water (luke warm)
50 grams of sugar
50 grams of margarine
13 grams of yeast
8 grams of baking powder

Preparation
Before I start the dough I need to have my filling ready, because it goes in before proofing.
This dough requires baking powder and yeast. I mix the margarine (which is at room temperature), sugar, yeast and baking powder through the flour and pour the lukewarm water in bit by bit.

I knead everything by hand into a beautifully smooth and shiny dough. It takes some time to make a proper dough. I need at least 15 minutes of kneading to get a nice and silky dough. To double check if the dough is okay I do the Window Pane test.
After this, I immediately roll the dough into a long sausage and cut it into equal pieces of about 30 grams each. I form round, equal ‘buns’ and place them under a towel.
Filling
Now I take one ‘bun’ and I knead it a bit more for extra fluffiness later.
I roll the dough out in a circle with a rolling pin until it is less than half a centimeter in thickness. I fill it up with a full teaspoon of my minced meat mix and close it up.
Close the bun
There are several ways to close ba pao. You can form beautiful flowers. Or you can also turn them upside down and leave the smooth part on top. Go to my first ba pao post to read and see more about folding the dough.

Proof for 40 minutes
Now the ba pao needs to proof for 40 minutes. I place them on parchment paper in my Chinese bamboo steam baskets (I make a few holes in to the paper to let steam through later). I make sure they do not touch each other.
While filling the buns they proof too, because it takes about 25 minutes to fill them all up. I try to work pretty fast though, so they proof quite equally.

Steam for 15 minutes
I steam them in my bamboo baskets for 15 minutes. I make a pile of two baskets and not more (otherwise the top basket is not steamed properly).
I fill up my big wok with boiling hot water and place the baskets on top (do not let the water touch the basket).

Separate them while still warm
After steaming they probably do touch eachother because they have become so much bigger en fluffier! I separate them while still warm. Then they are easy to separate.
When I warm my ba pao up before serving (for instance the next day) I pile up more baskets. They will be warm and ready to eat; also the top layer.

For one or two ba pao I use my microwave. Even from the freezer they are ready to eat in less than a minute. I serve them with chili or sweet soy sauce. I love them with hoisin sauce too.